I am so very excited to introduce you to the wonderful world of microgreens! Come with me and discover a nutritional powerhouse that you can easily access in your kitchen.
Growing up, I was familiar with sprouts. The most popular sprouts were mung beans (I have some delicious sprouted mung recipes on my website). Mom used to soak beans in water overnight. The next morning, she drained the water, wrapped up the moist beans in a muslin cloth and set it on the countertop. Every 12 hours, she’d sprinkle a little water on them. In less than 48 hours (remember I grew up in the tropics), Mother Nature worked her magic and we’d have germination! This wonder of nature has never ceased to marvel me. From seemingly dead and dry seeds springs Life, when nurtured with just a bit of water!
Microgreens
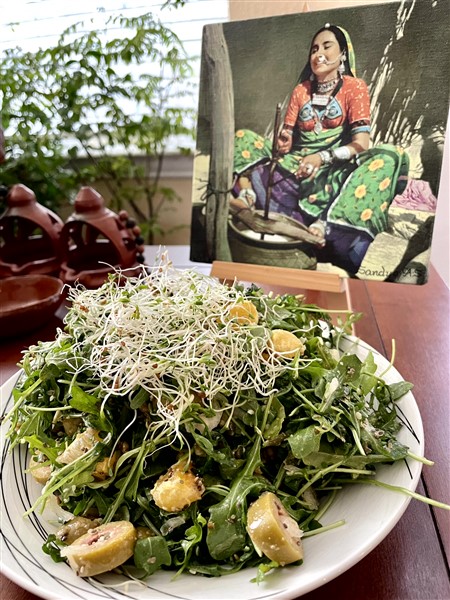
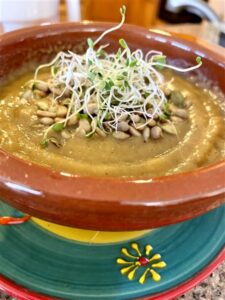
Microgreens on my Salad
I got an introduction to microgreens at a Herb Guild meetup. This is a group of gardening enthusiasts that meet once a month to discuss growing something edible. One of the presenters showed us how easy it is to grow microgreens at home. Microgreens can be grown in something that’s as basic as take-out tupperware. Poke holes in the bottom of the tupperware, fill the bowl with some good quality potting soil, sow the seeds and lightly cover them with some more soil. Keep moist and allow Mother Nature to do her job. In a few days, tiny saplings poke their heads through the dirt. At that time, move the container to an area that receives direct sunlight indoors. Harvesting these delicate beauties happens when the microgreens are about 3 inches tall. Snip them off just above the line of dirt, rinse and refrigerate.
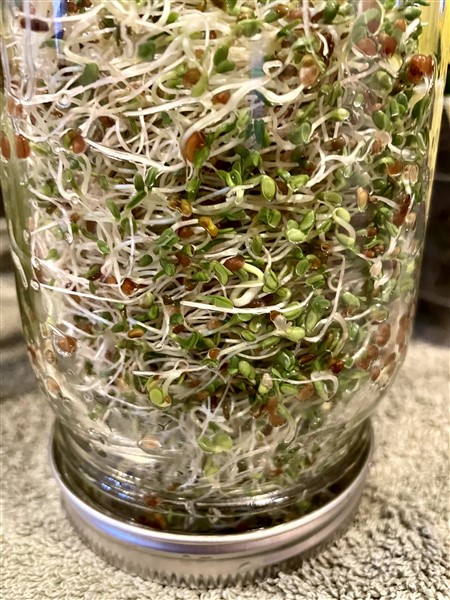
There’s yet another (easier in my mind) way of growing microgreens. And that is – in a sprouting jar! I use my sprouting jar for sprouting just about any legume: mung, horse gram, black chana, garbanzos etc. Instead of getting your hands muddy (of course, there’s nothing wrong in that!), while growing microgreens in trays, you just sprout them in jars. This is a lot less messier for sure. Plus, the added benefit is that you get to consume the roots as well. There is no mess of dirt and rinsing involved.
Types of Microgreens
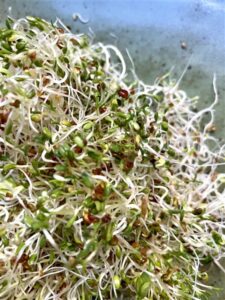
Microgreens – Alfalfa, radish, Broccoli and Clover
The variety of microgreen seeds that you can grow is mind boggling. I estimate that there may be more than 60-70 varieties of microgreens! Check your local nurseries or online retailers for sprouting seeds. There are mild green varieties like cabbage, kale, mustard tatsoi, cabbage, bok choy, mizuna, amaranth and a host others. If you want them a bit spicy, several choices are purple mustard, red kale, purple kohlrabi etc. Alfalfa, radish, broccoli and clover make a good combination. Definitely choose organic seeds.
All said and done, feel free to pick microgreen seeds of your choice – as I’ve already said, there are tons to choose from. Some of my favorites are broccoli, arugula, radish, pea, kale, mustard, clover, amaranth and alfalfa. Another suggestion is to pick seeds that have a similar germination schedule. Otherwise, you will have some that have sprouted, while the others are severely lagging behind. Growing a single variety of microgreen eliminates this risk, but you miss out on the different tastes that these shoots afford. Another idea is to have 2-3 small sprouting jars, and grow different varieties in each jar. Combine while consuming.
Growing microgreens is the best gardening activity that involves nothing more than a bottle with a lid that has holes. Don’t tell me you don’t have a green thumb. 🙂
How to Start Growing Microgreens
First off, let me assure you that you DO NOT need a green thumb to grow microgreens in a bottle. All you need is some patience (sprouting doesn’t happen overnight!), a decent memory (to rinse them out), some microgreen seeds, and a sprouting jar.
Like I mentioned, the variety of microgreens is mind-boggling. Pick something that appeals to you. Try and see if you like the taste. If you don’t, move to another choice. In case you do love your first choice, add another variety!
You can use either a fancy Sprouting Jar set like this one or simply use the mason glass jars you own and find the appropriate Sprouting Jar Lids.
Go to the Recipe Section to start your microgreens journey! Use the comments section for any questions that you may have.
Did you know that microgreens are even more nutritious than their mature and grownup counterparts? Sometimes 30-40 times more nutritious! They are brimming with fiber, folate, vitamins, minerals, phytochemicals and antioxidants. All these aid in lowering blood pressure, fighting cancer, delaying aging, improving gut health and much more.
Nutritious Sprouts Recipes
We have several sprouts recipes that you can browse through and make your favorites your meal staples.
- Sprouted Black Chana Sundal | Kadale Kaalu Usli
- Spicy, Tangy Sprouts & Carrot Salad
- Zesty Carrot Garbanzo Usli
- Carrot-Cucumber Kosumbari
- Sprouted Moong-Cucumber Kosumbari Salad
- Wholesome, Spicy Sprouts Dosa
- Easy Mung Sprouts Masala
- Stir Fry Sprouts & Veggies
- Sautéed Sprouts and Vegetables
- Green Mung Sprouts Curry
Do you love our posts and recipes? We’d LOVE to see your creations so click a photo and tag us on Instagram with the hashtag #healthyindian3 and please give a star (★) rating below. Follow us on Facebook, Twitter, Pinterest, Instagram, YouTube & Tumblr for healthy, easy and delicious recipes and lifestyle tips.
*There could be affiliate links in this blog. As an Amazon Associate we earn from qualifying purchases.

The Magic of Microgreens
Equipment
Ingredients
- 1 Teaspoon Microgreen Seeds - Some of my favorites are broccoli, arugula, radish, kale, mustard, clover, and alfalfa.
Instructions
- Pick microgreen seeds of your choice - there are tons to choose from. Some of my favorites are broccoli, arugula, radish, kale, mustard, clover, and alfalfa.
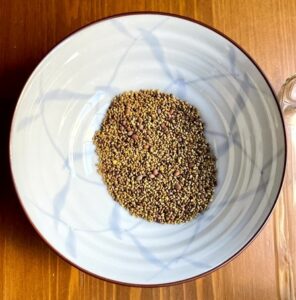
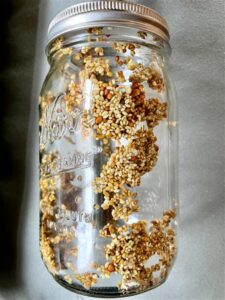
- Add a teaspoon of seeds into your sprouting jar and fill with cool water to fully cover the seeds. Allow seeds to soak for 6-10 hours (or follow instructions on the seed packet).

- Drain the water thoroughly (do not soak again) and allow the sprouting jar to lay on its side in a dark-ish area of your pantry for 24 hours. Keep rinsing and draining with cool water every 3-6 hours.
- On day 2 or 3, when you see the seeds slowly releasing their sprouts, move the sprouting jar to a well-lit location (no direct sun!).
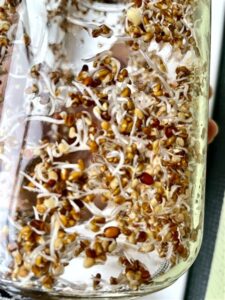
- Continue to rinse and drain every 3-6 hours. I know, you are getting impatient, but trust me, it is totally worth waiting for the magic to happen!
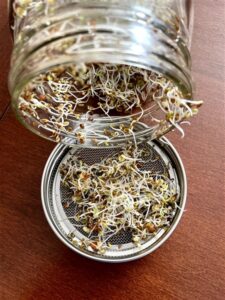
- Harvest on day 5-10 when the leaves are open and green. The number of days to harvest depends on the variety of seeds you've used. Refrigerate for upto 4-5 days.
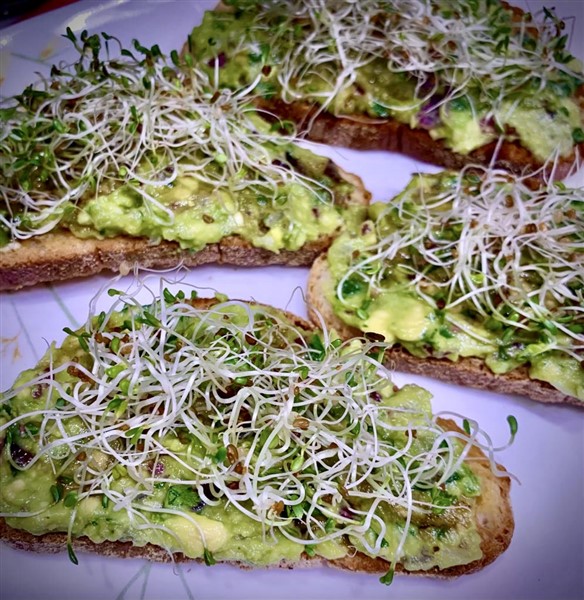
- Use microgreen sprouts on soups, toast or add to salads or omelette. You can even add it to your curries or smoothies! Allow your creative juices to flow.
Fantastic article Mal. Can’t wait to use your tips
Thanks Preeti. I hope you enjoy microgreens as much as we do.
Well written article!! Thanks so much for using my photo of the Avocado on Toast with microgreens you gave me, Mal 👍🏻 It is one of our favorites.
It is a quite a regular feature in our home as well.
Magic of Microgreens refers to the amazing health benefits packed into tiny, young vegetable greens. Harvested just 7–21 days after sprouting, microgreens are rich in vitamins, minerals, and antioxidants—often containing higher nutrient levels than mature plants. They add vibrant flavor, color, and nutrition to salads, sandwiches, and smoothies in a small but powerful way.
Read More: https://paarigreens.blogspot.com/2026/02/what-are-microgreens.html
Great article to complement my recipe!